How to Use Google Analytics (GA4) to Track Lead Events on Your Website
Google Analytics has built-in event tracking that automatically works with your RealtyNinja website. You can use it to track when the following lead events happened on your website:
- Listing leads from the "request more info" and "request a showing" forms shown on listing pages
- Building leads from the "request more info" forms shown on building pages
- Contact form leads from any form widget on your website (contact form, buyers form, sellers form)
Configuring Google Analytics to Show Lead Events
Before you can view any lead event data in Google Analytics you need to make some configuration changes depending on how you have your GA4 snippet setup:
Sometimes it can take up to 48 hours after you have configured GA4 for the lead events to start showing
Now that you have configured GA4 to start showing lead event data, there are 3 main ways that you can view the data in Google Analytics 4:
- Realtime Report
- Events Engagement Report
- Custom Reports
Google Analytics has all sorts of built in events and it can be sort of overwhelming when trying to understand the data. For our purposes we will only be focusing on our custom lead_form event and page_url data point. You can ignore everything else for now.
Realtime Report
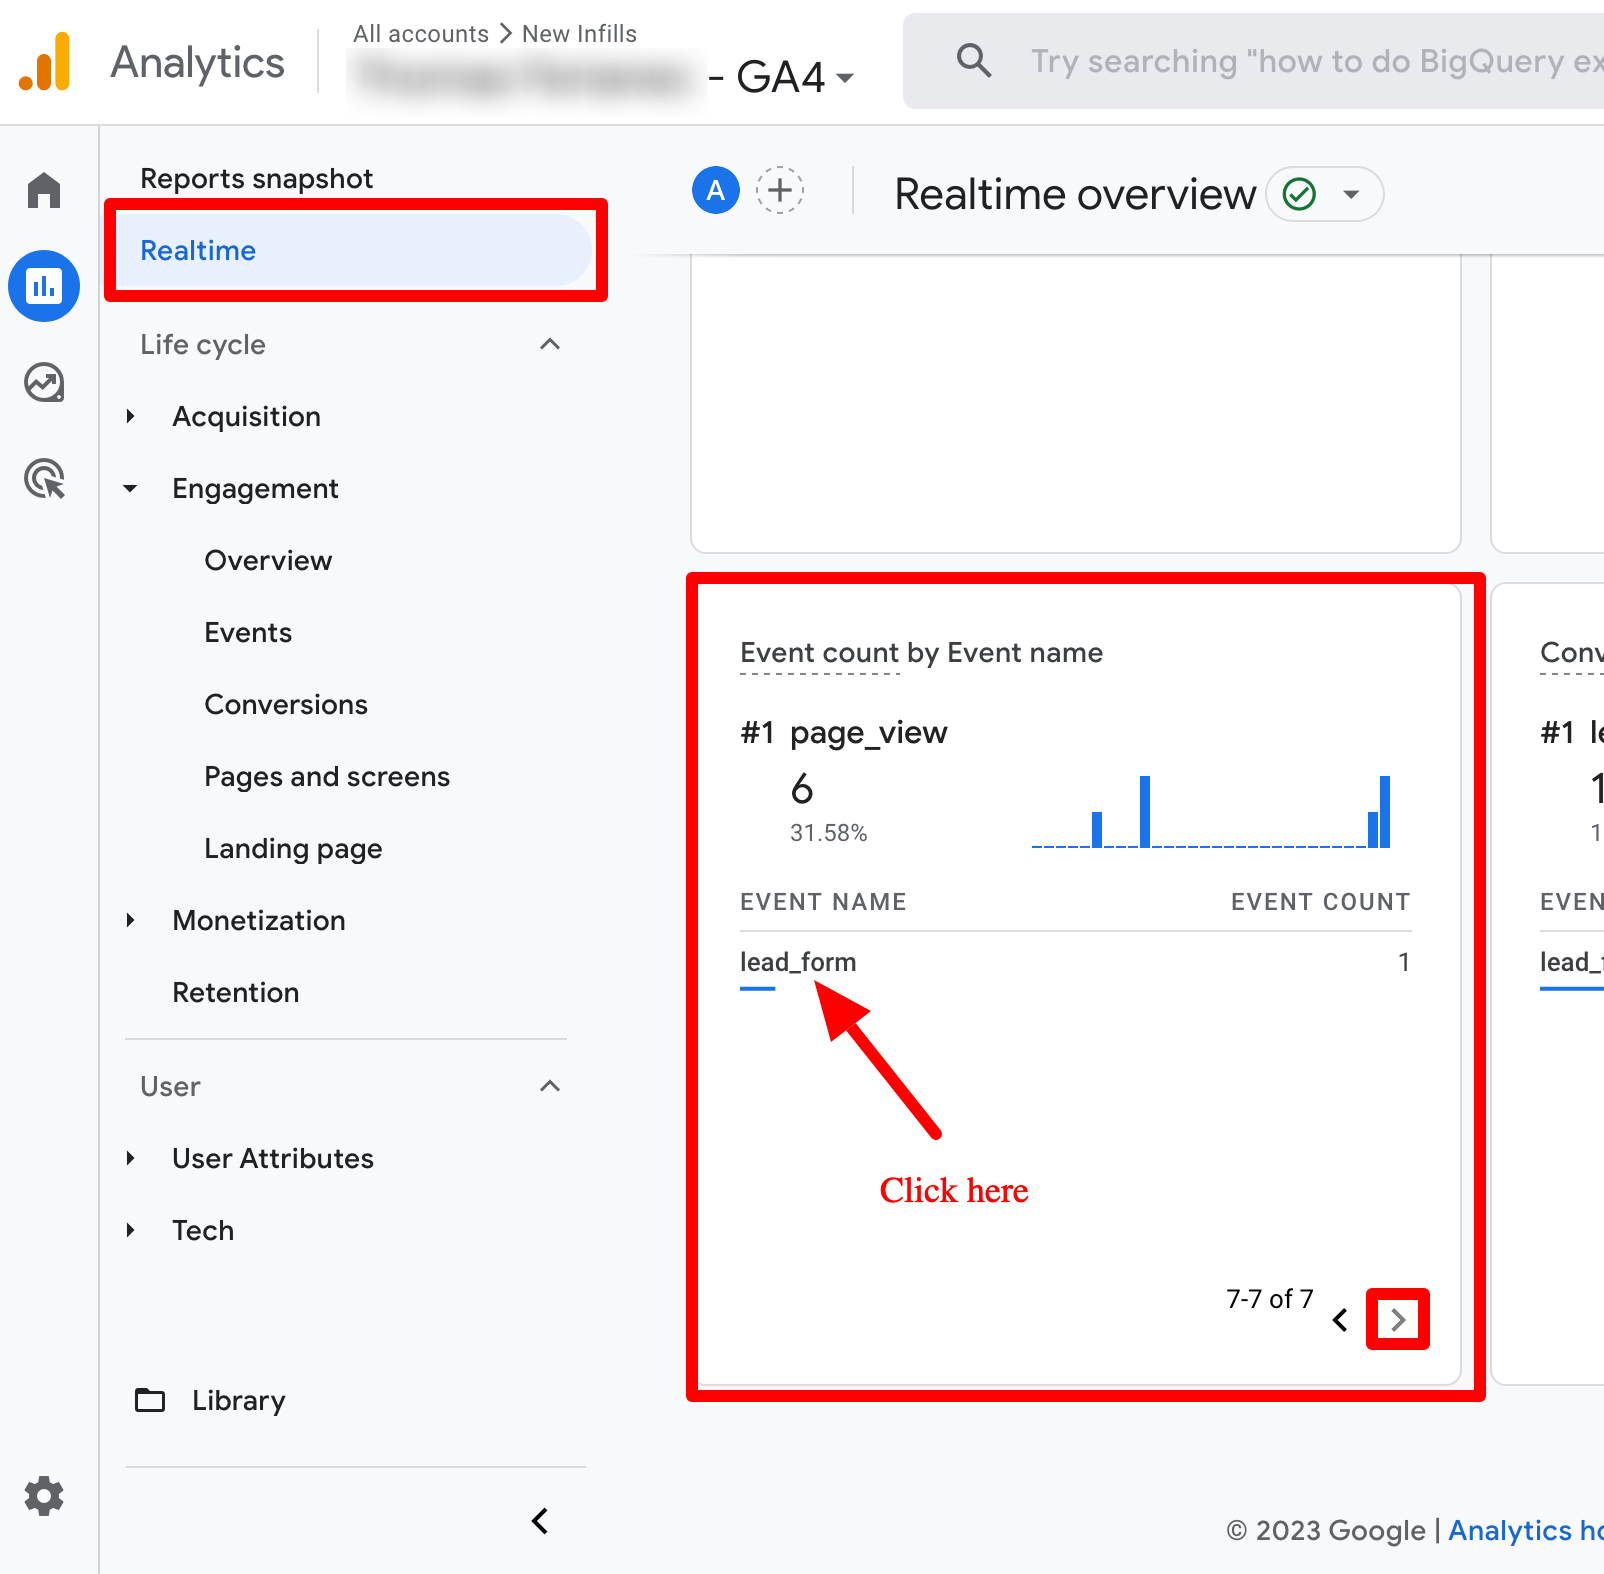
The Realtime Report gives you an idea of what is happening right now on your site. For this reason it is not the best report to use to view historical leads but it can be handy to ensure the lead events are working as well as monitoring events in general.
Step 1: Click Realtime in the top left and then scroll down until you see the Events card. You might have to click the arrow to see all the recent events names. When you find lead_form click on it and if you do not see it, that means there has not been a lead_form event on your site in the past minute or so.
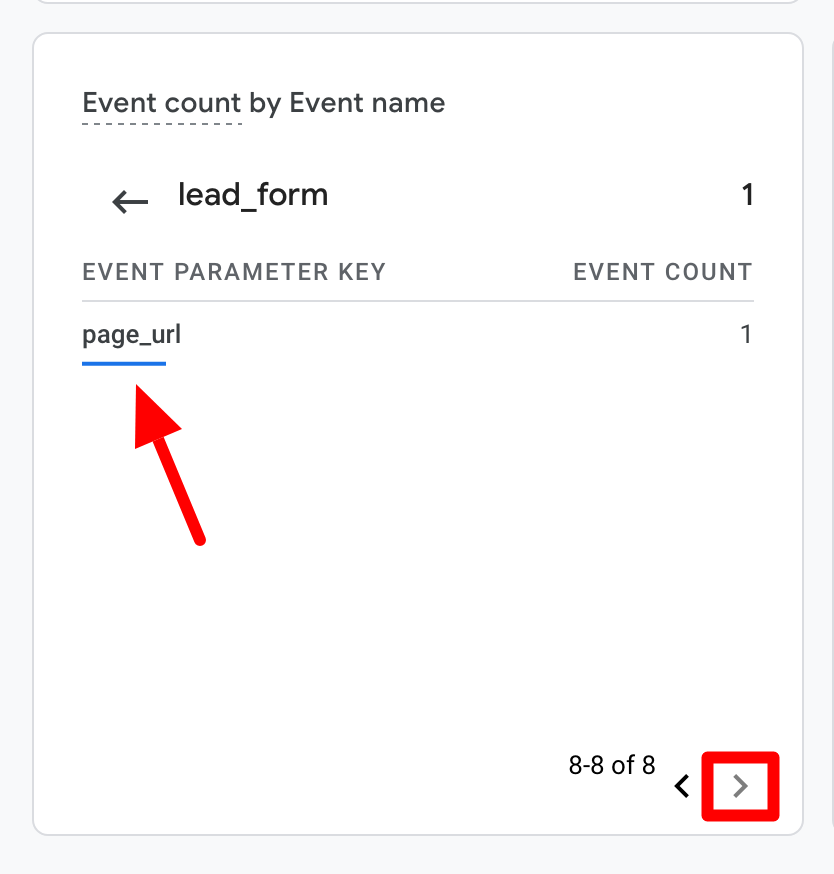
Step 2: Once you click on the lead_form event you will now see a list of Event Parameter Keys. You want to find page_url and click on it. You might have to click the right arrow to scroll through the available parameters
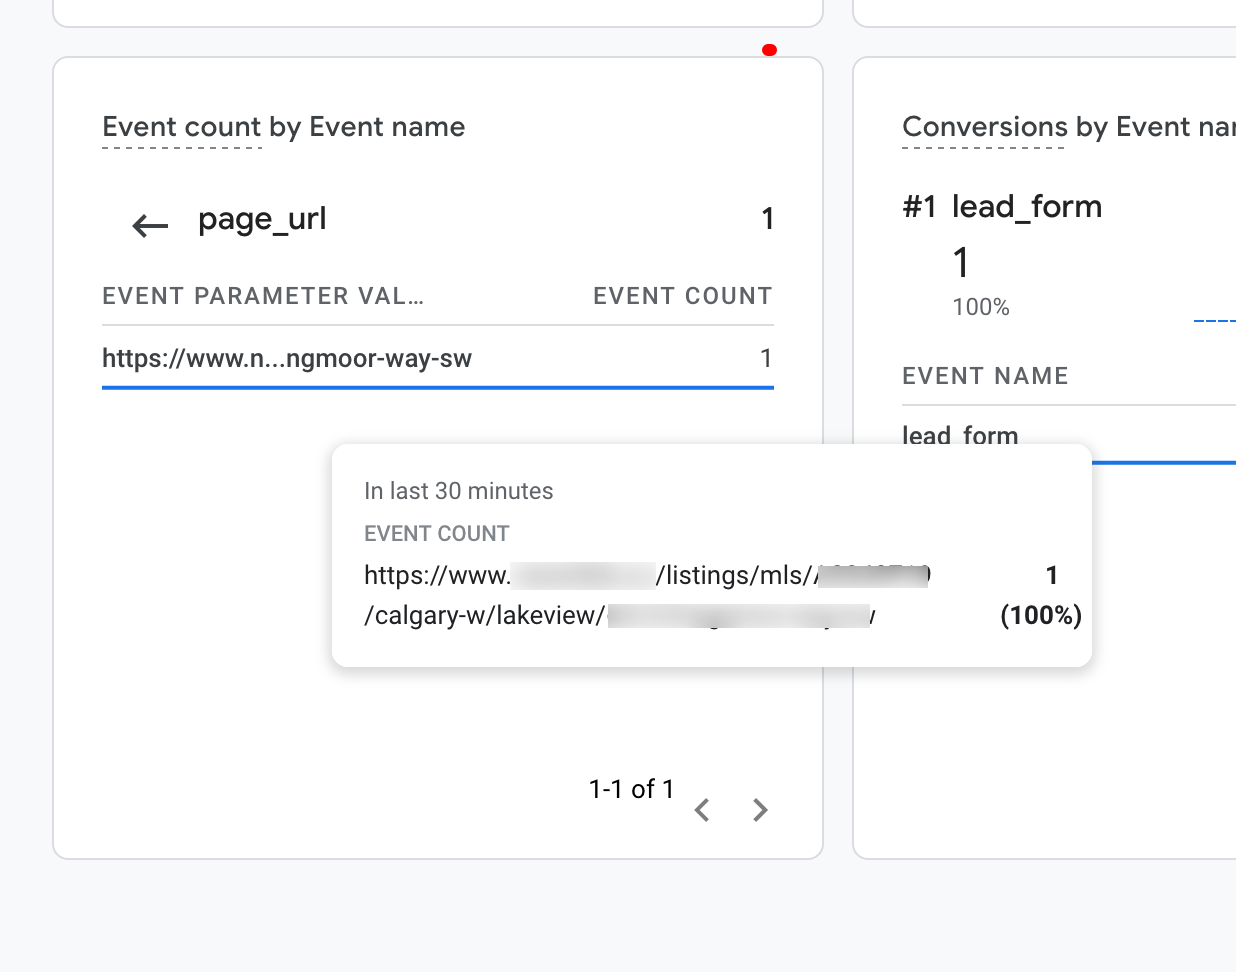
Step 3: Now you can see which page/listing URL the lead form was submitted on
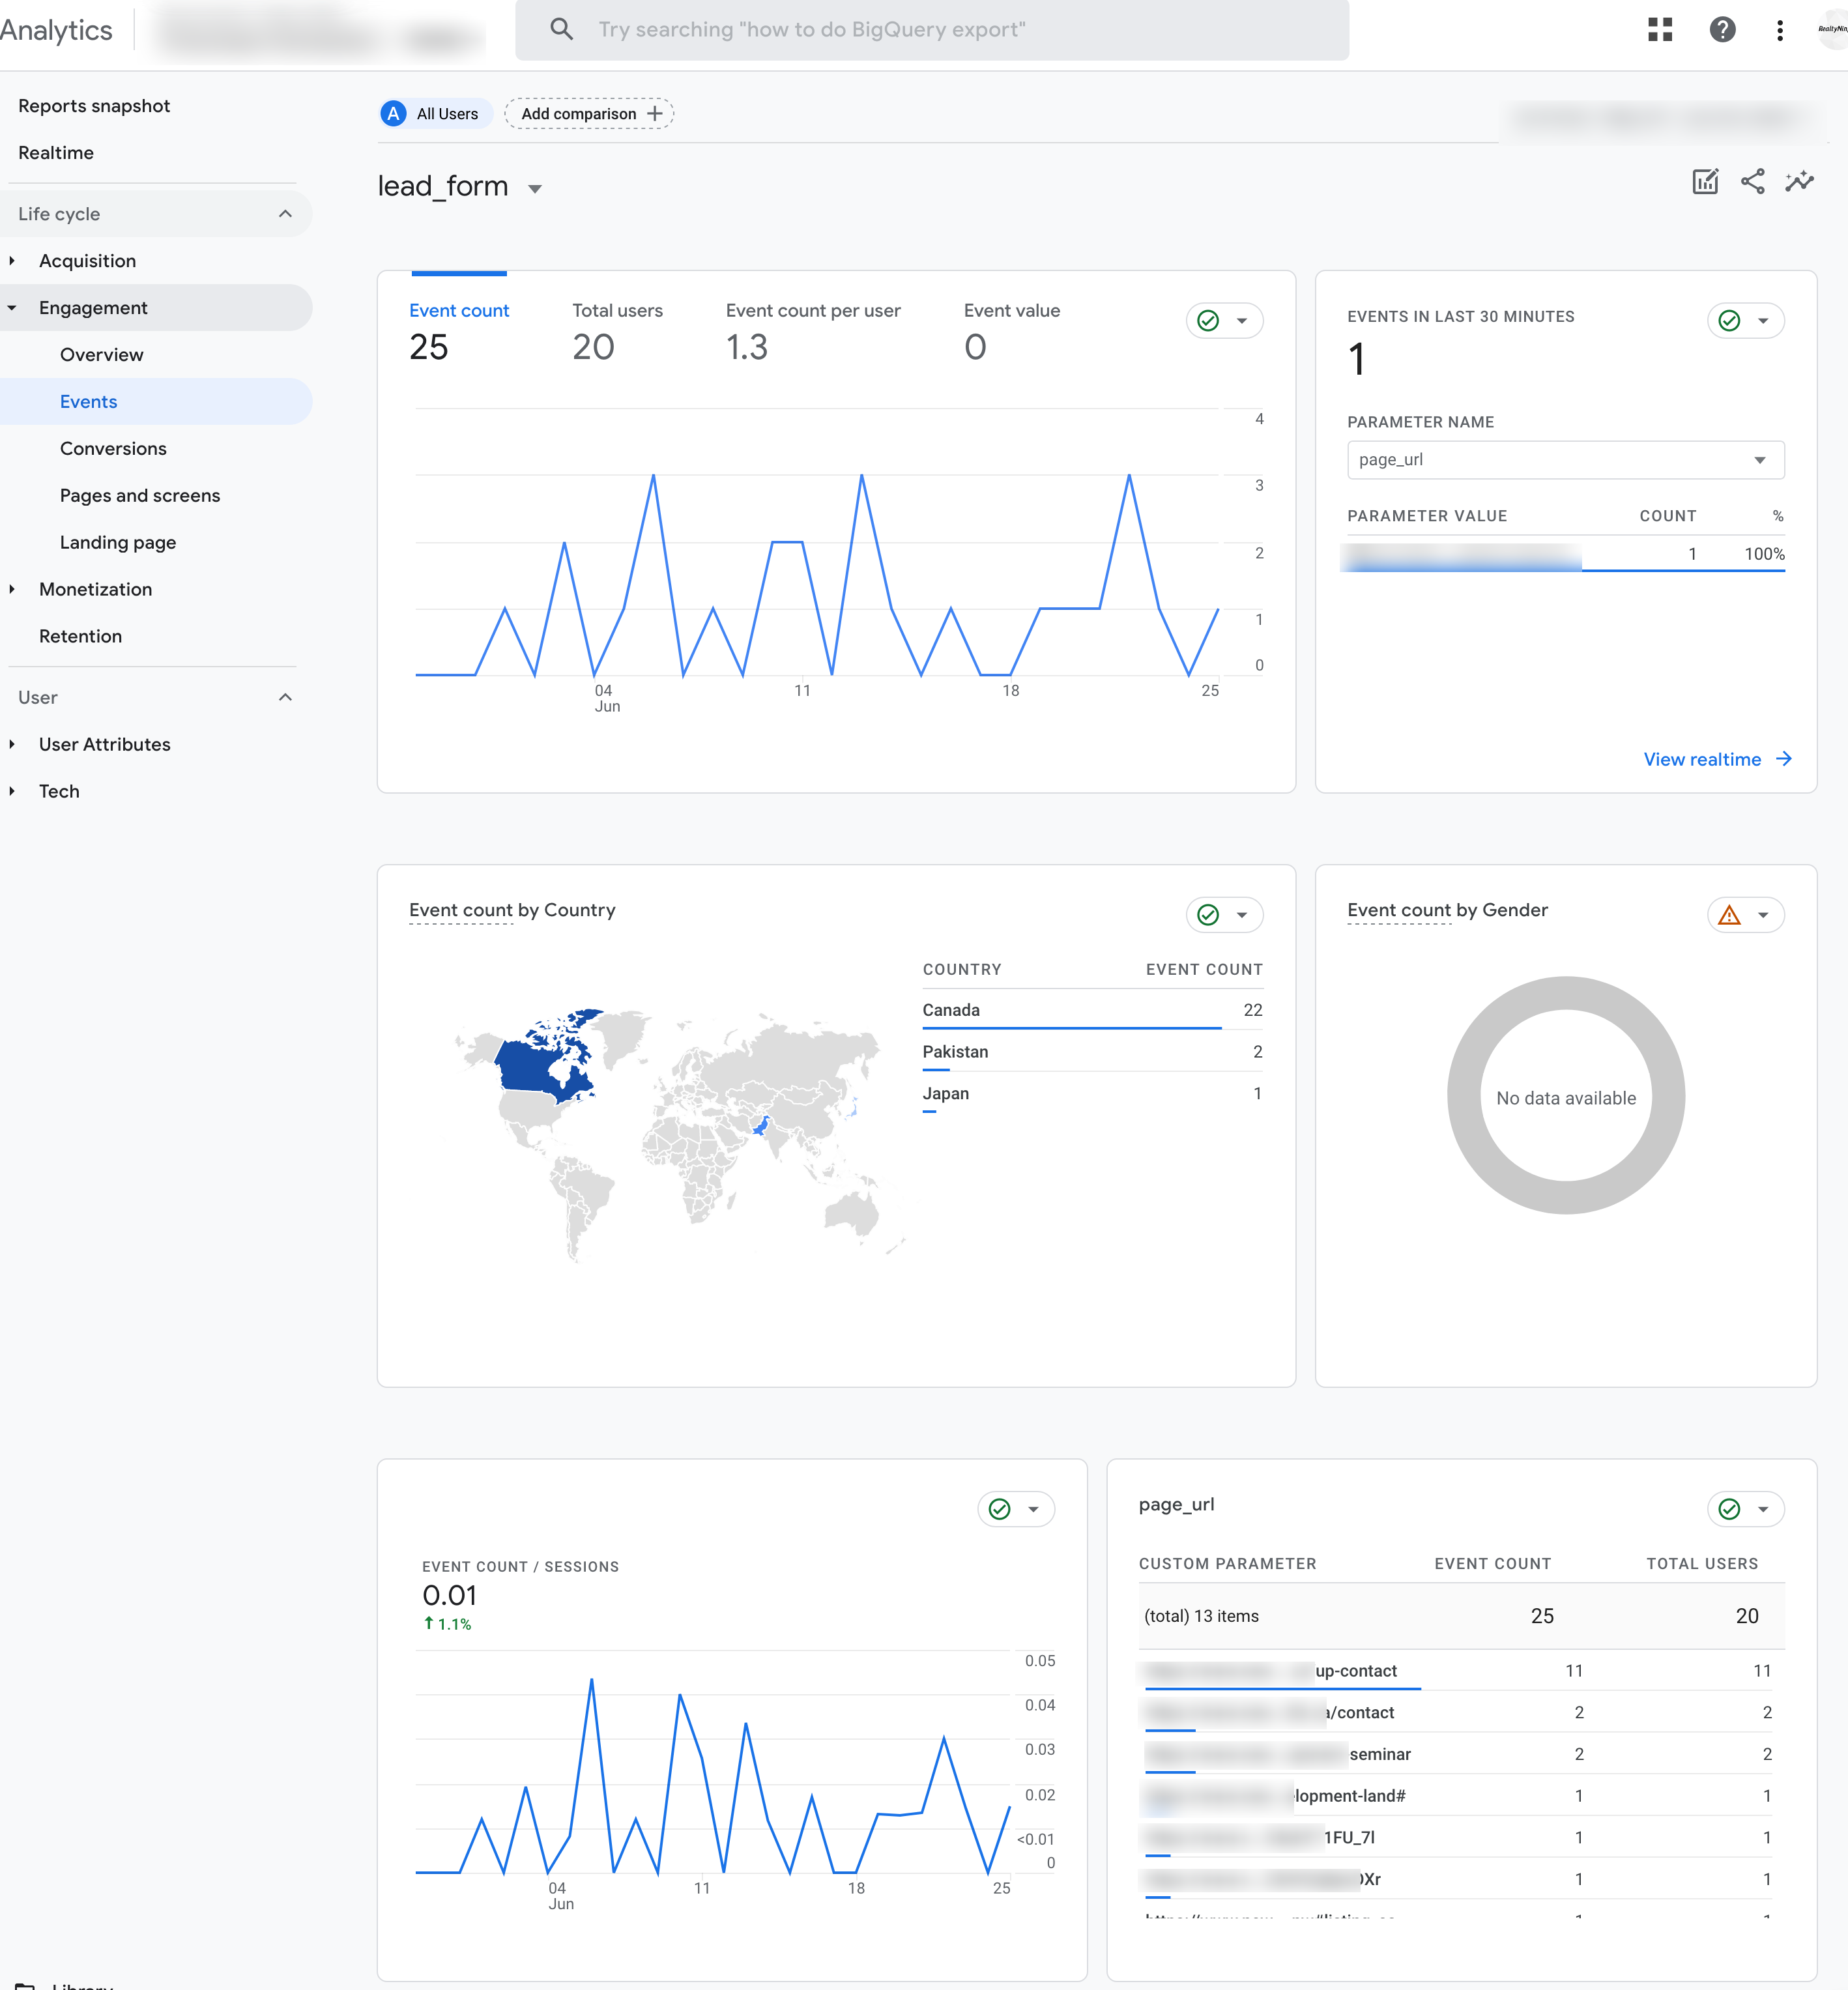
Events Engagement Report
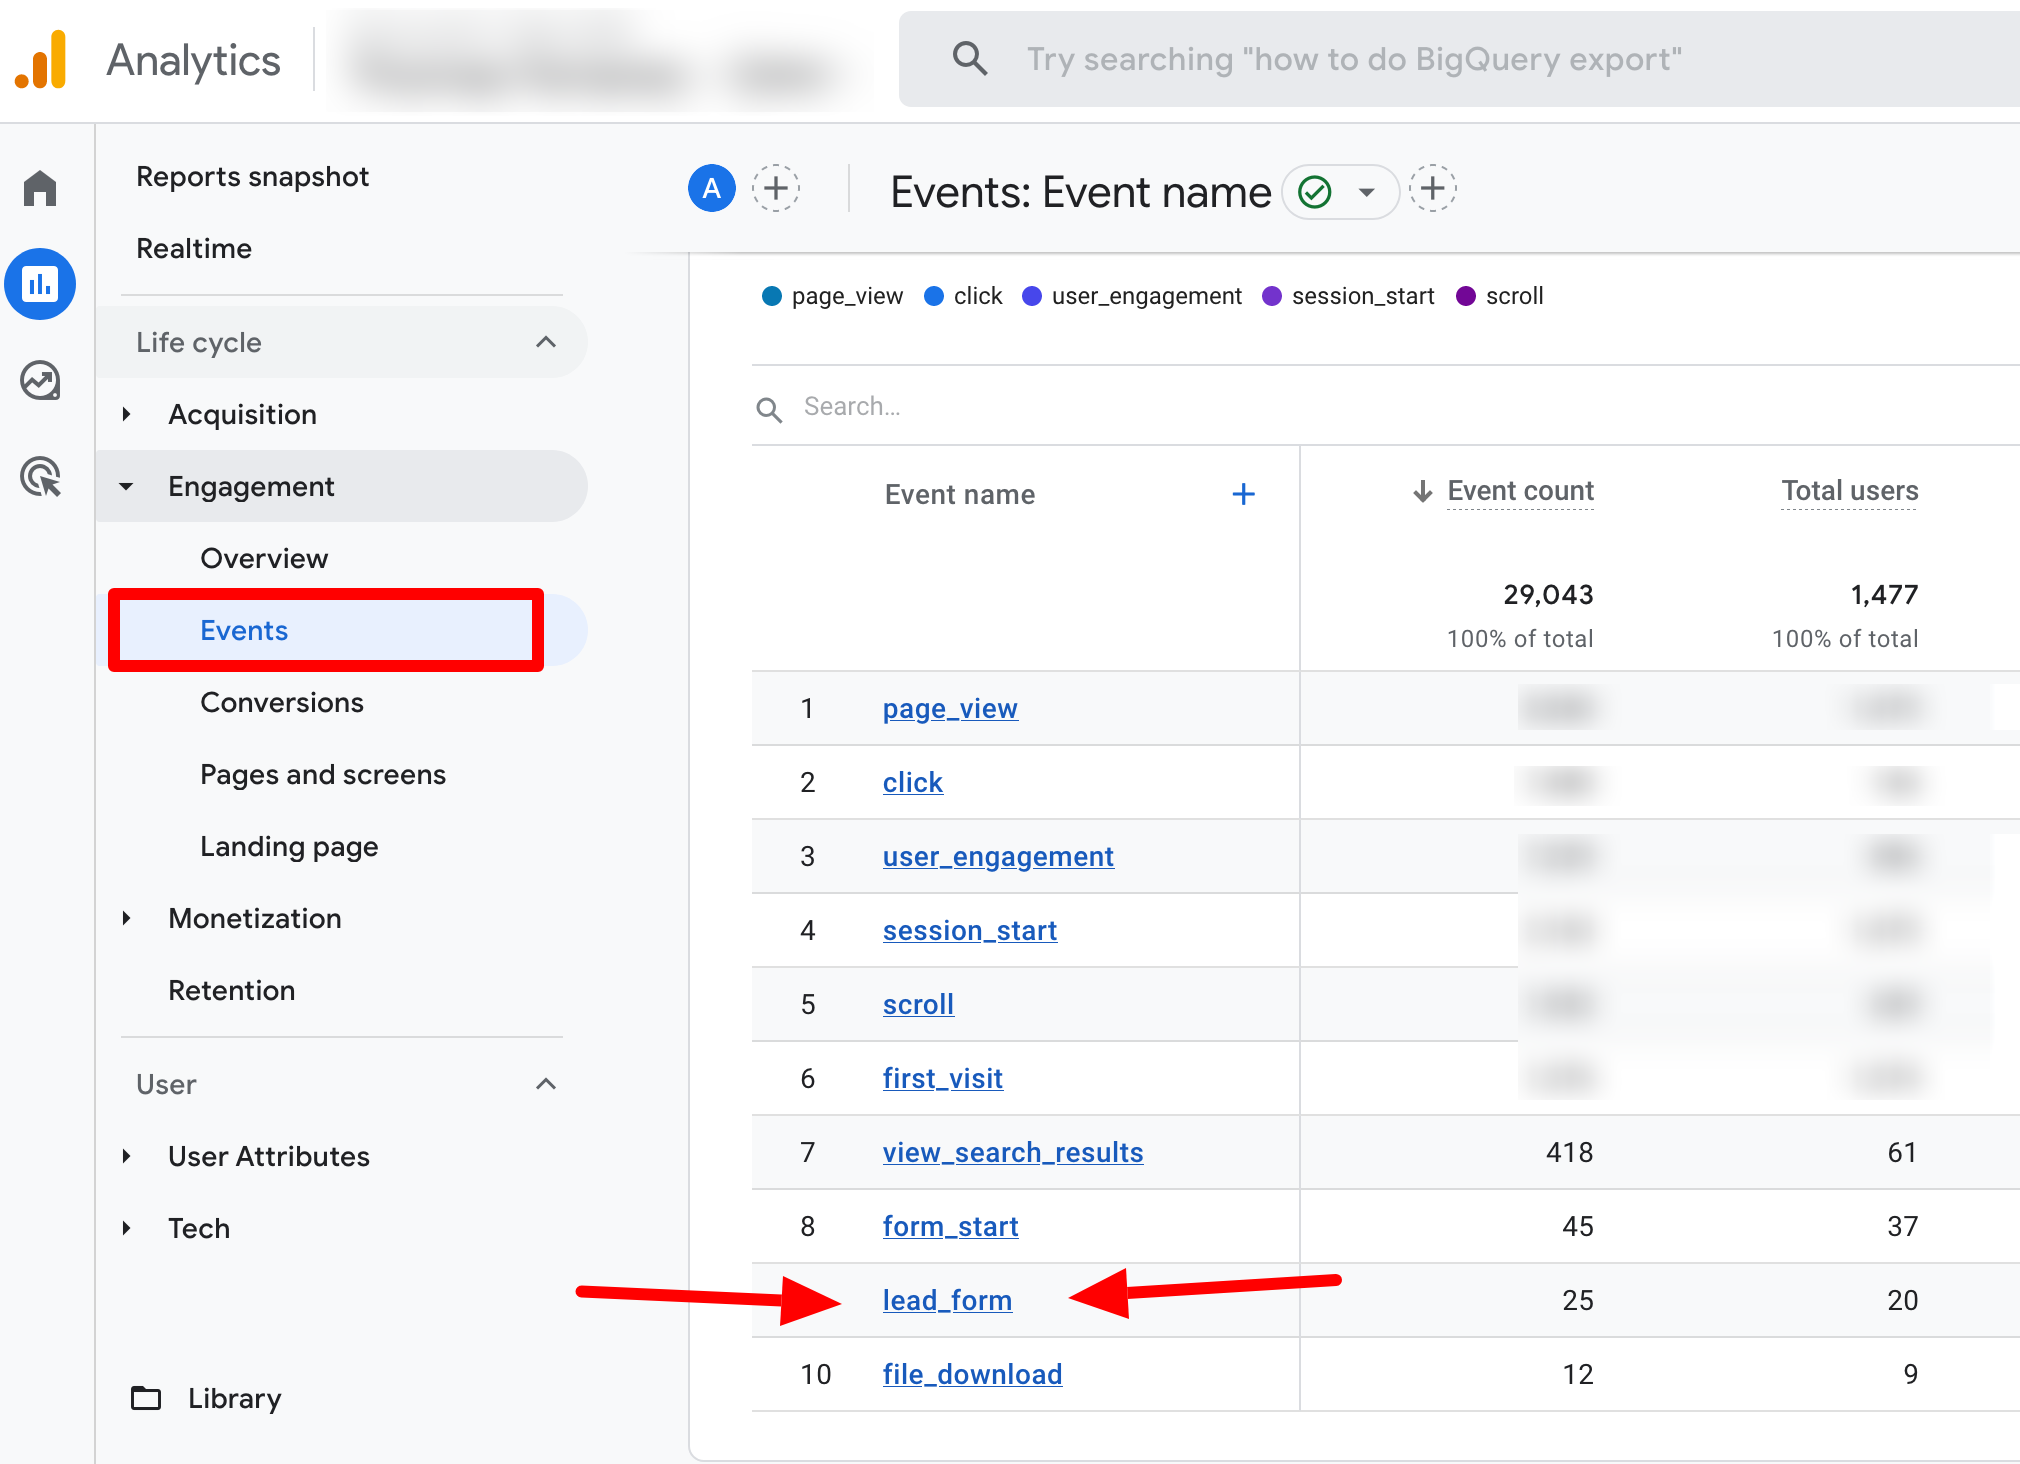
Step 1: Click Events under the Engagement left side menu item. This will bring you to a page listing all of your events. Navigate the list and click on the lead_form event
Step 2: You now have a summary of all lead_form events in whatever time frame you have defined for your report. Of particular note is the bottom right card labelled page_url which shows which pages or listings the leads have been coming in through
Custom Reports
Custom reports are very powerful but are more complicated to setup. Here are instructions for setting up a basic custom report that shows how many lead events were fired on each page, listing or building.
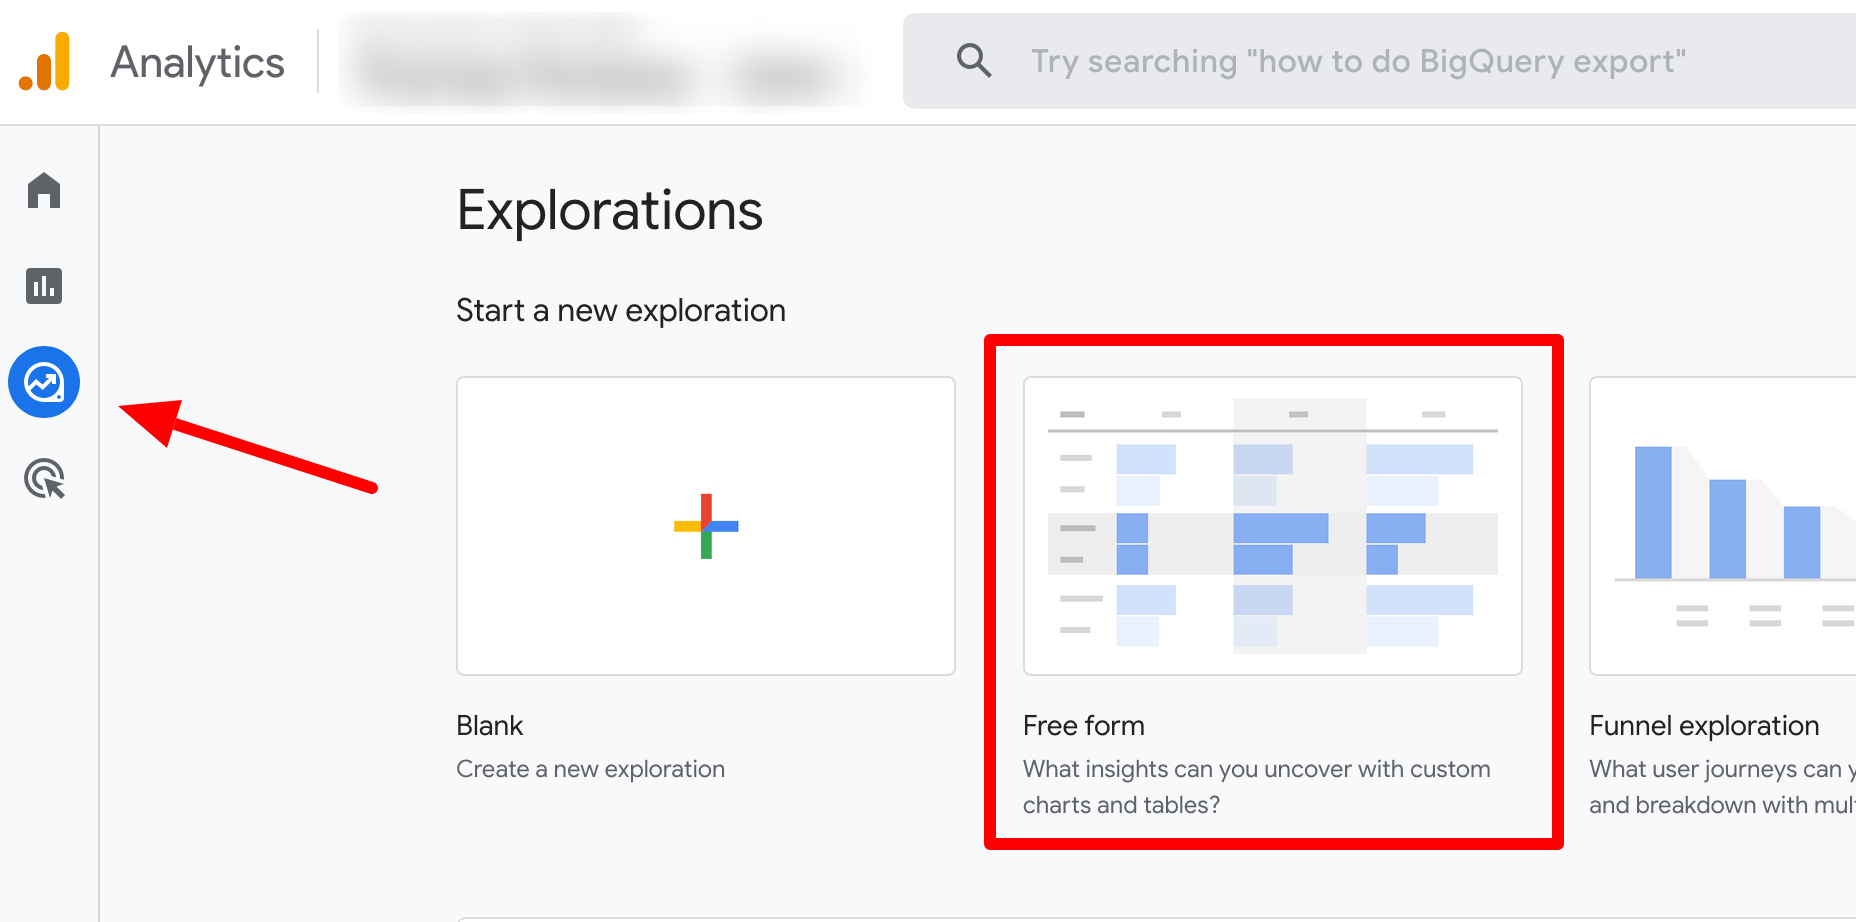
Step 1: Go to the explore section and create a new free form report by clicking on Free Form.
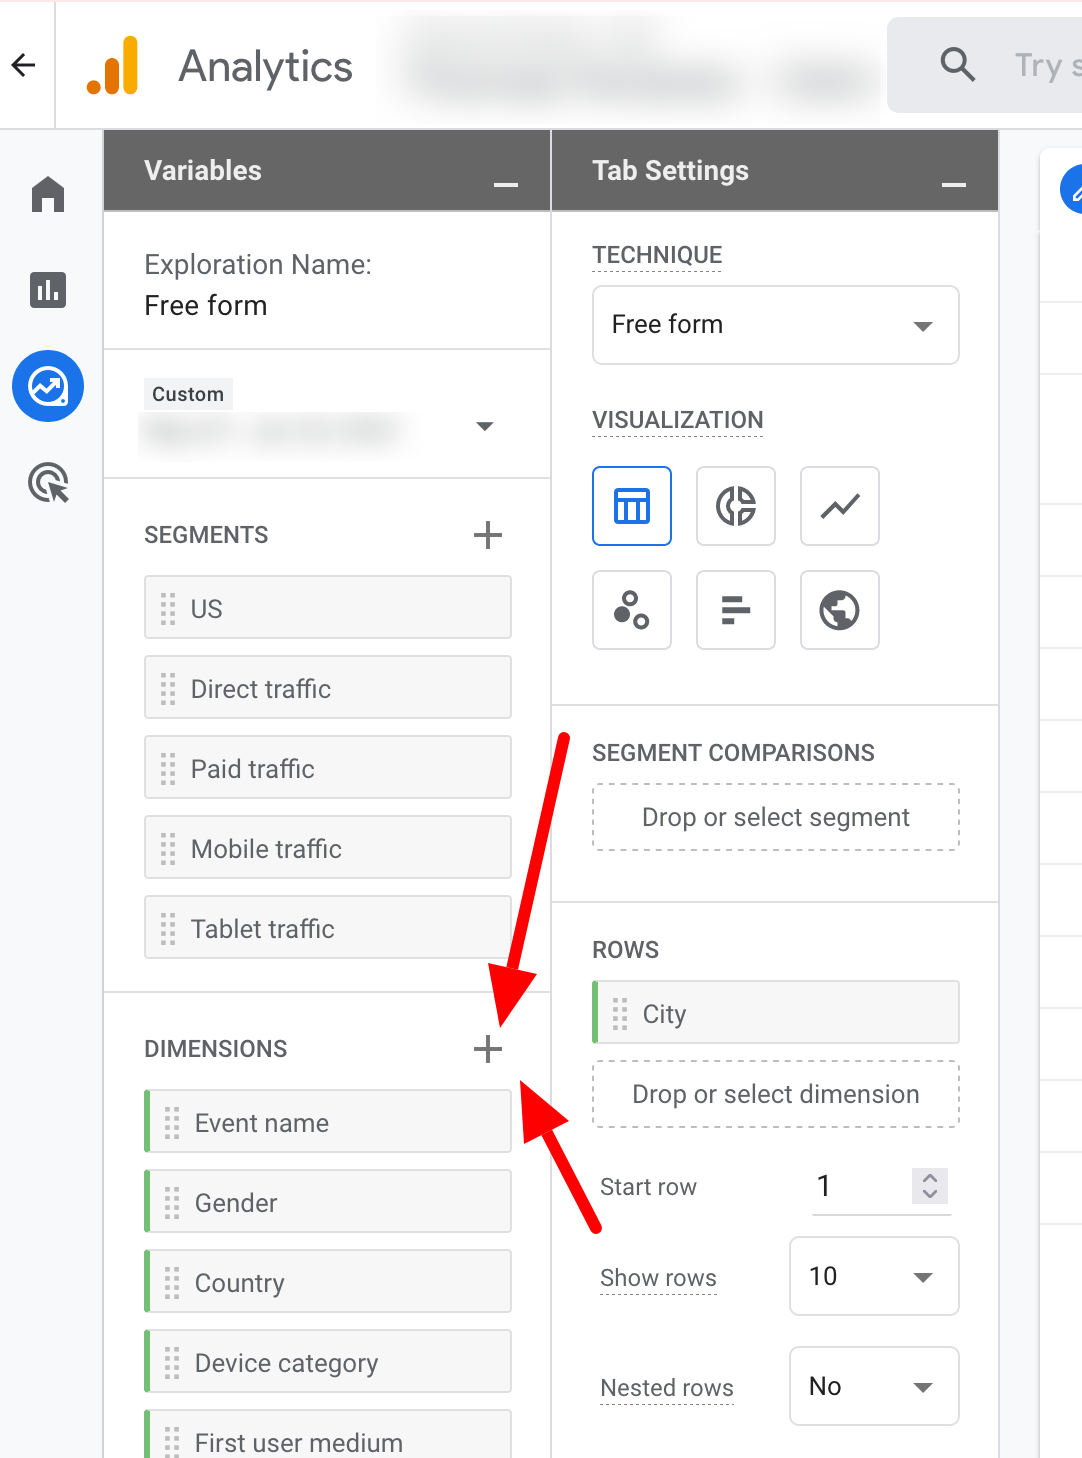
Step 2: Ignore the default report that is shown and add a new Dimension by clicking the plus sign
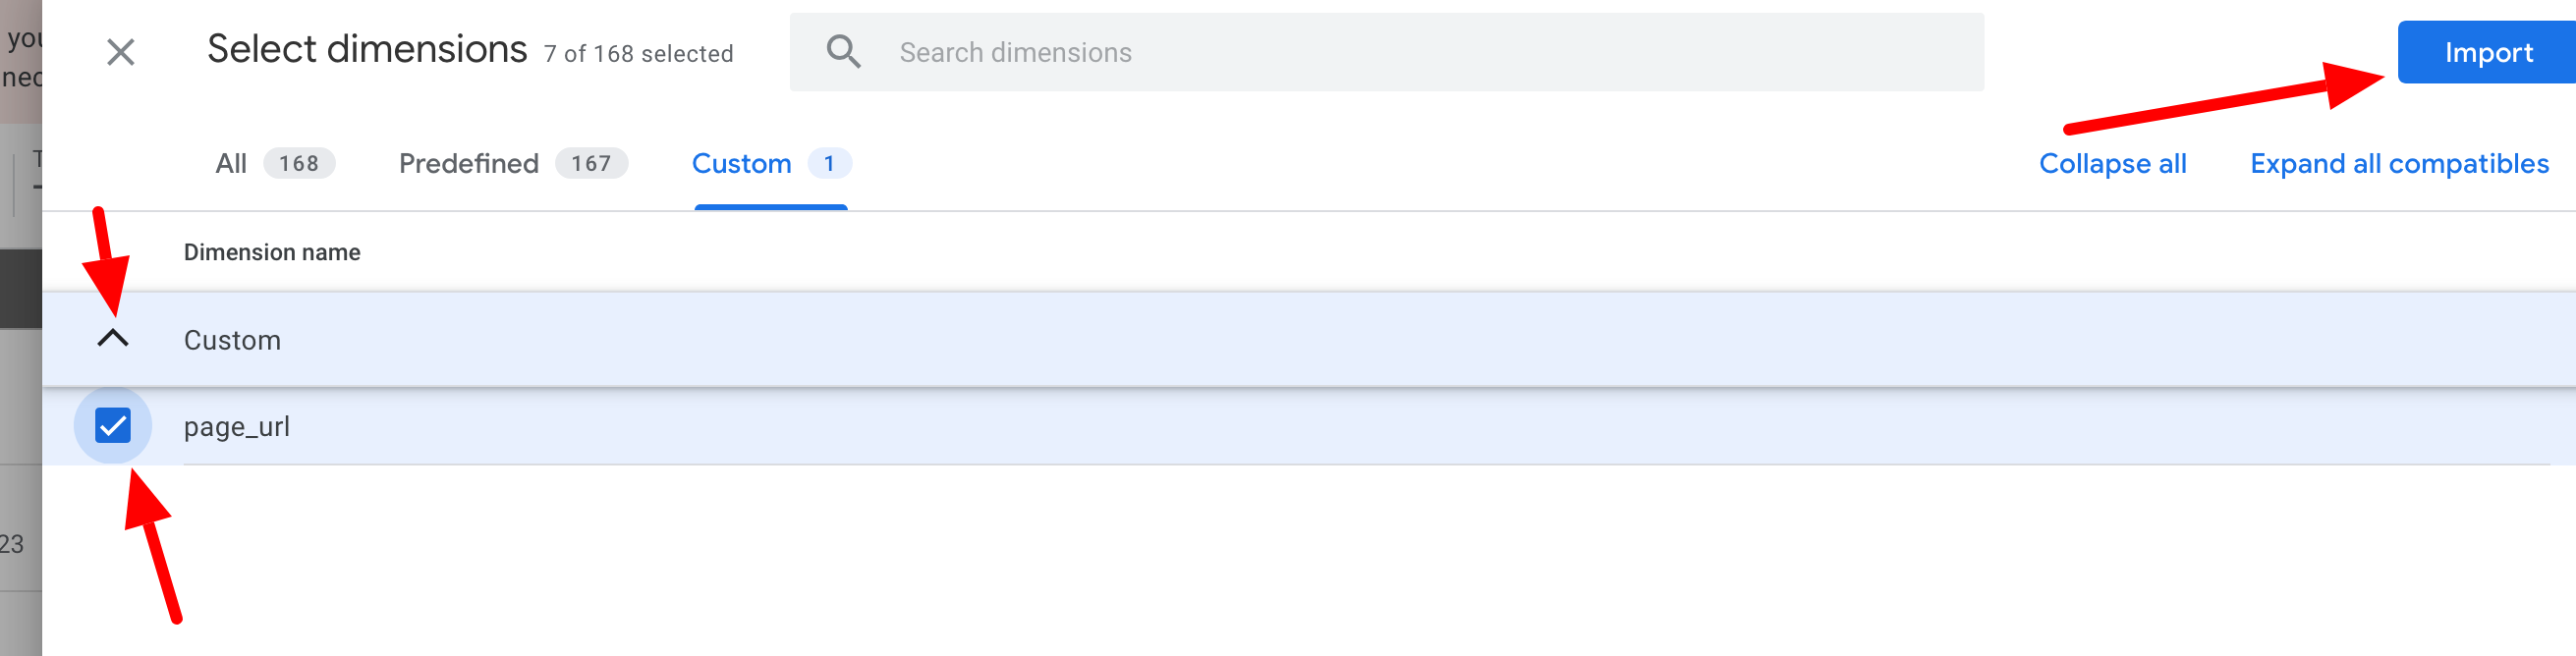
Step 3: Click the Custom category
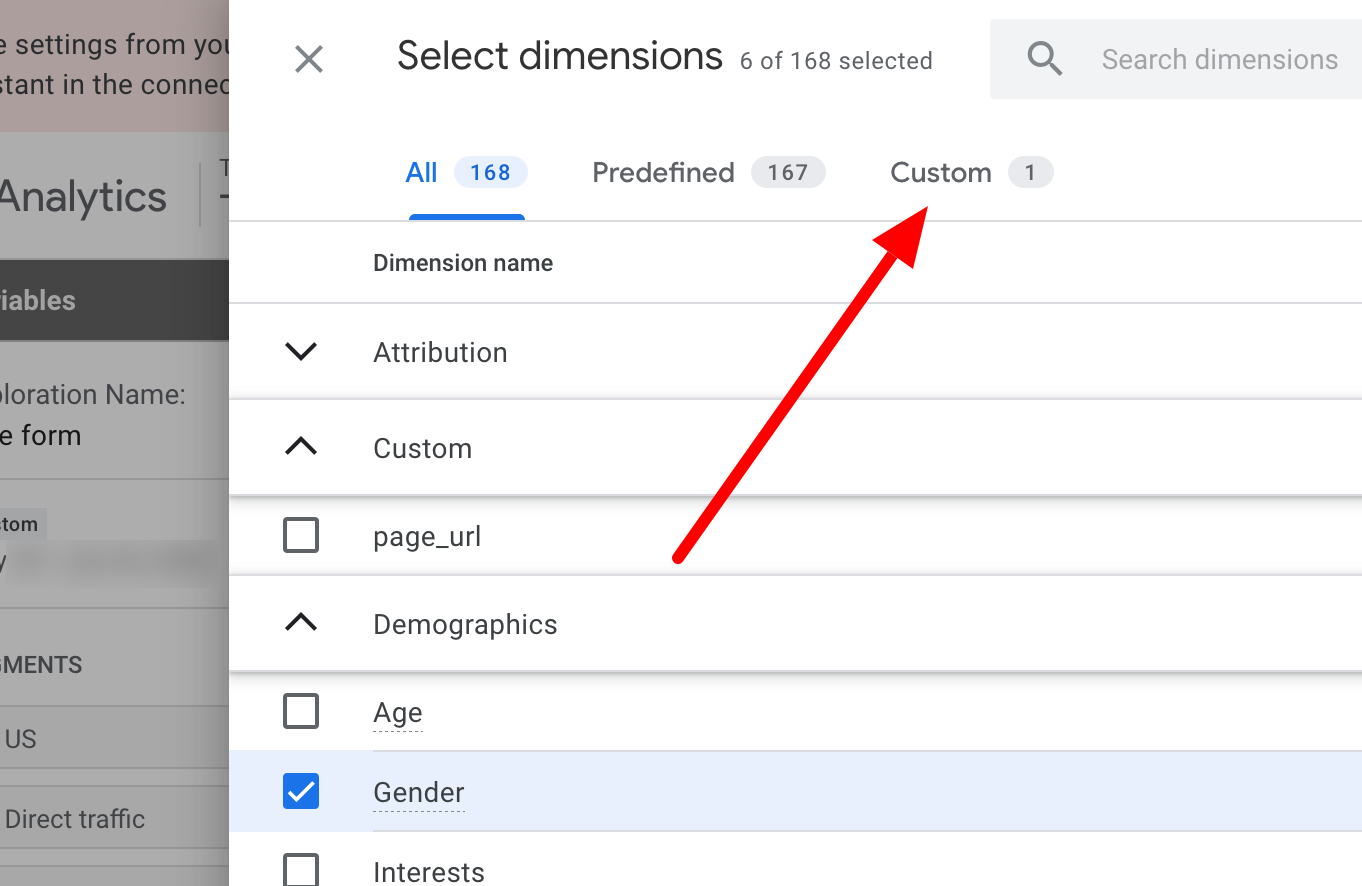
Step 4: Click the arrow beside Custom, select page_url and click Import
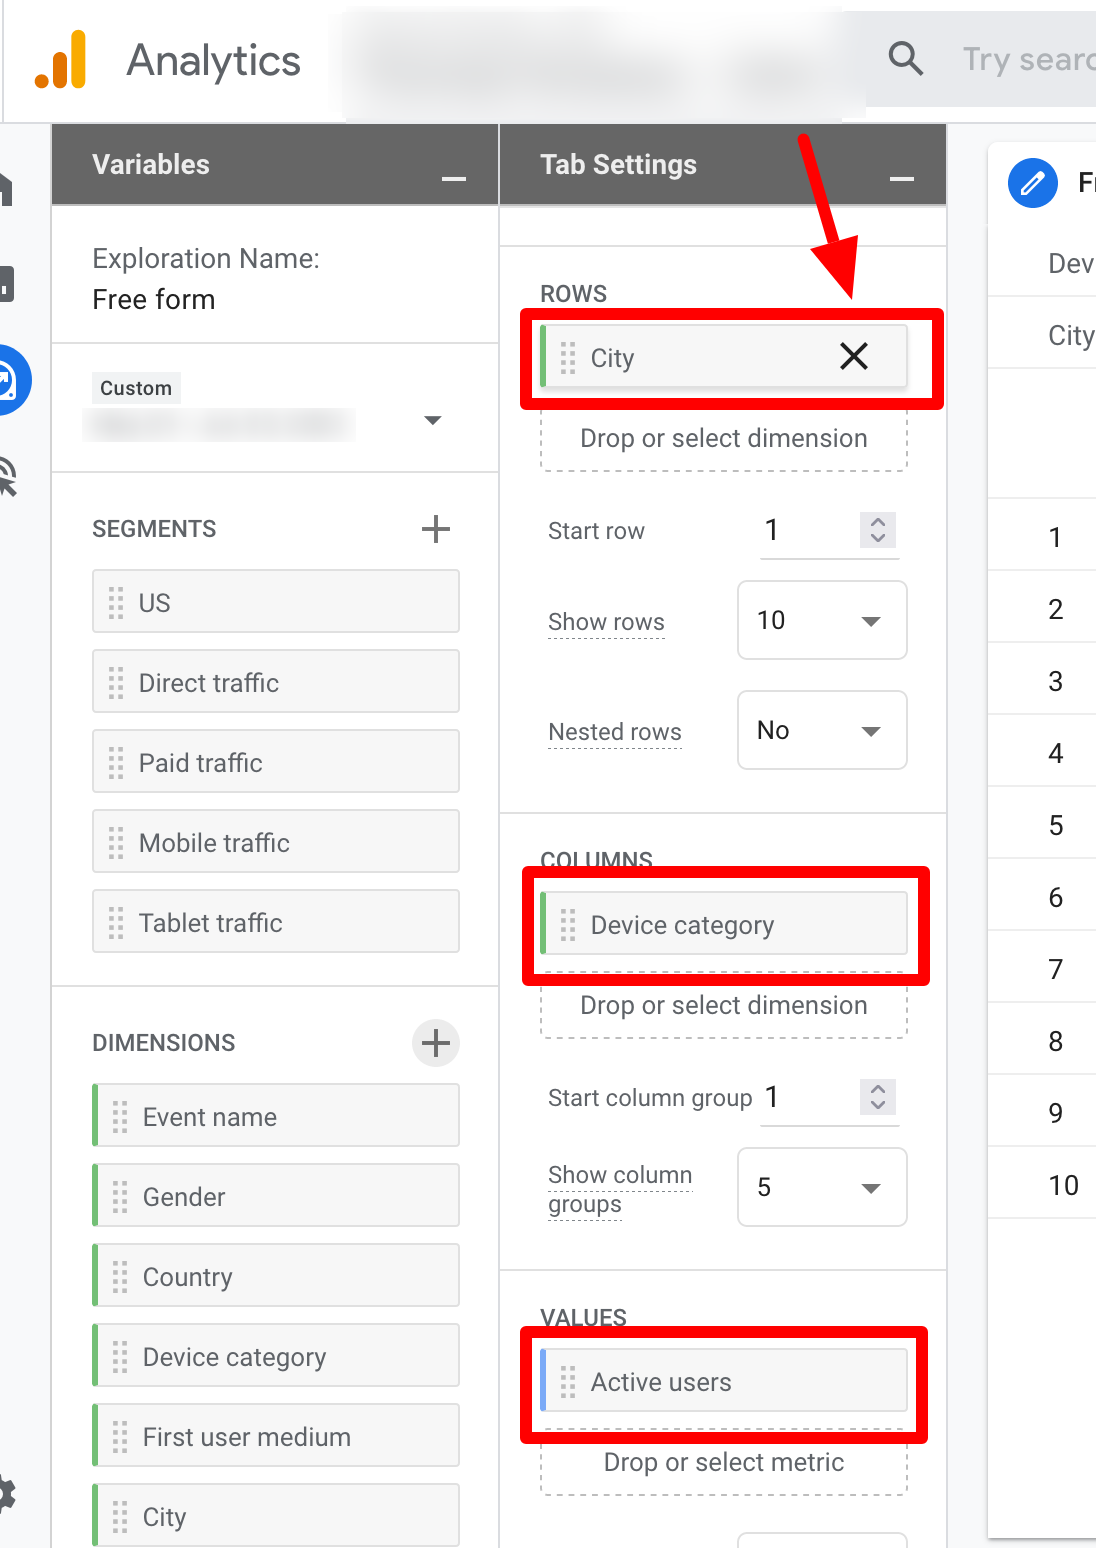
Step 5: Remove the pre-selected options by clicking the X beside each option when you mouse over it
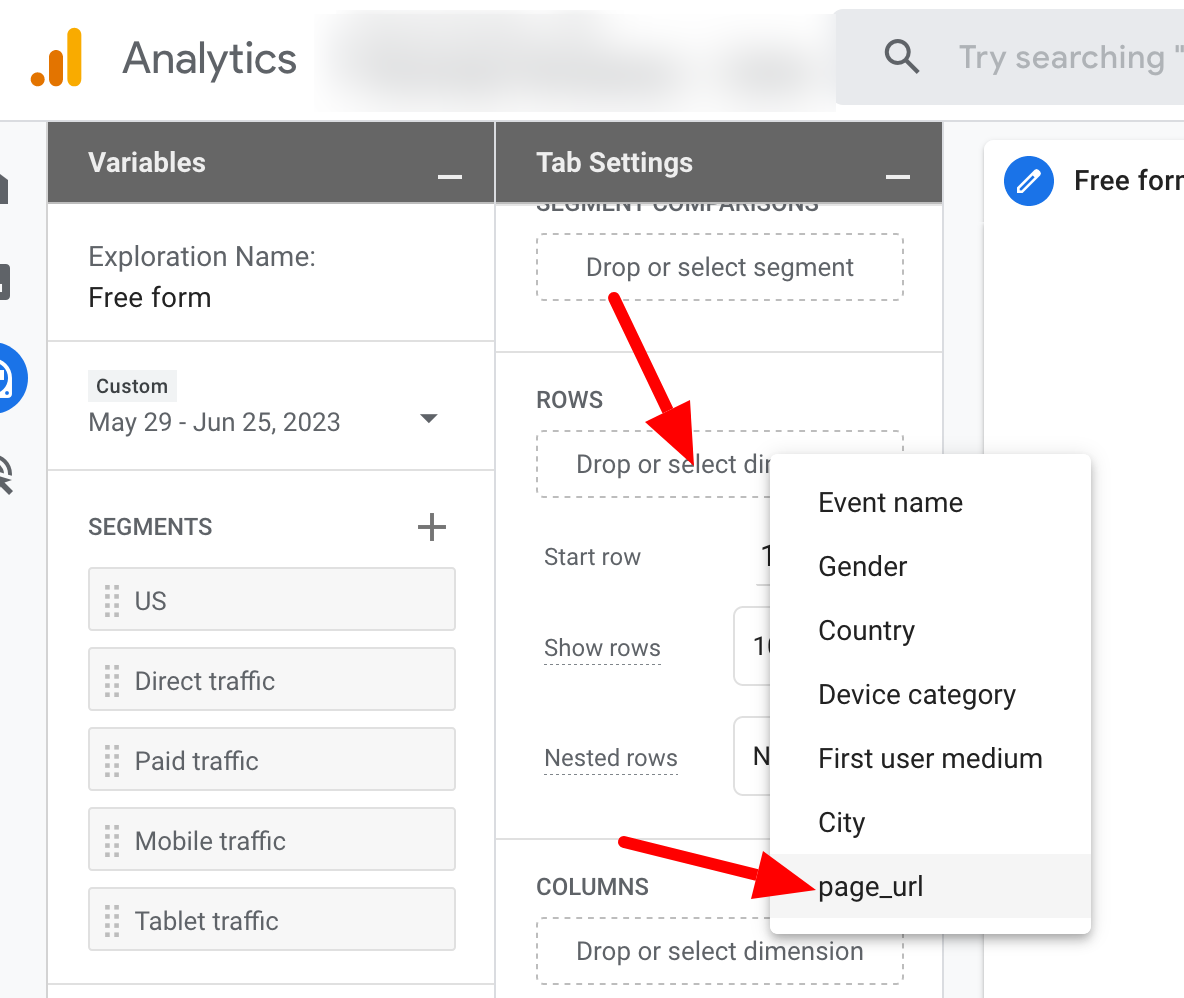
Step 6: Click into the area labelled Drop or select metric under the Rows section and choose page_url
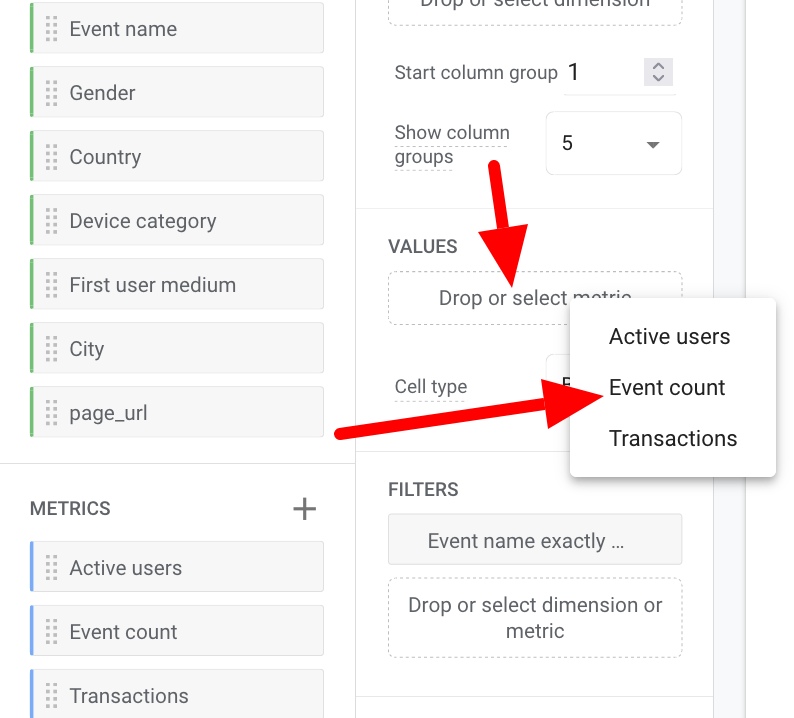
Step 7: Click into the area labelled Drop or select metric under the Values section and choose Event Count
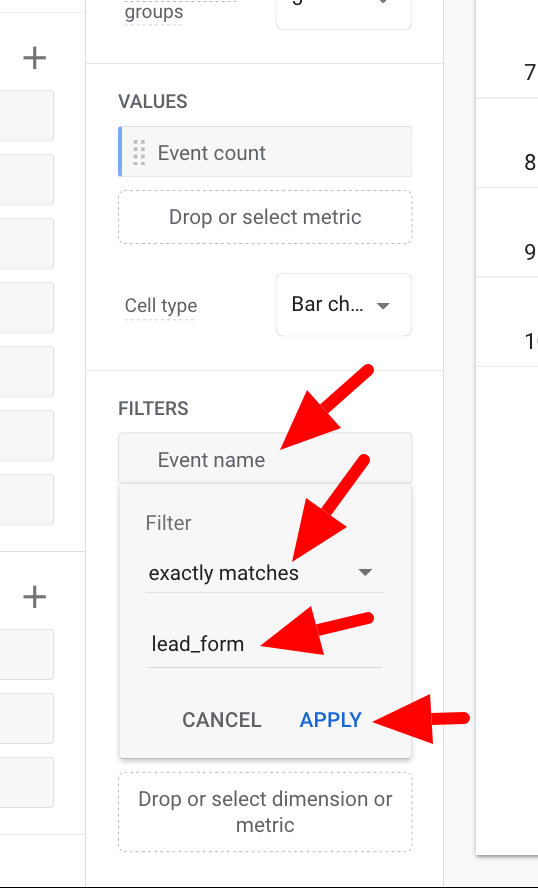
Step 8: Click into the area labelled Drop or select dimension or metric under the Filters section and choose Event Name Exactly Matches lead_form
You now have a custom report which can be sorted, exported and augmented with other dates. That is out of the scope of this article.
Advanced Tracking
If you're working with an online marketing company or you need detailed event tracking to go even further than what is detailed above, we recommend
using Google Tag Manager.


